Creating a News Article or Featured Profile
For general information on how to access the site and/or use the new site editor, please review the Creating Pages resource. The editor has the same layout options for a news article as it does for a page. The only difference is there are different configuration options available.
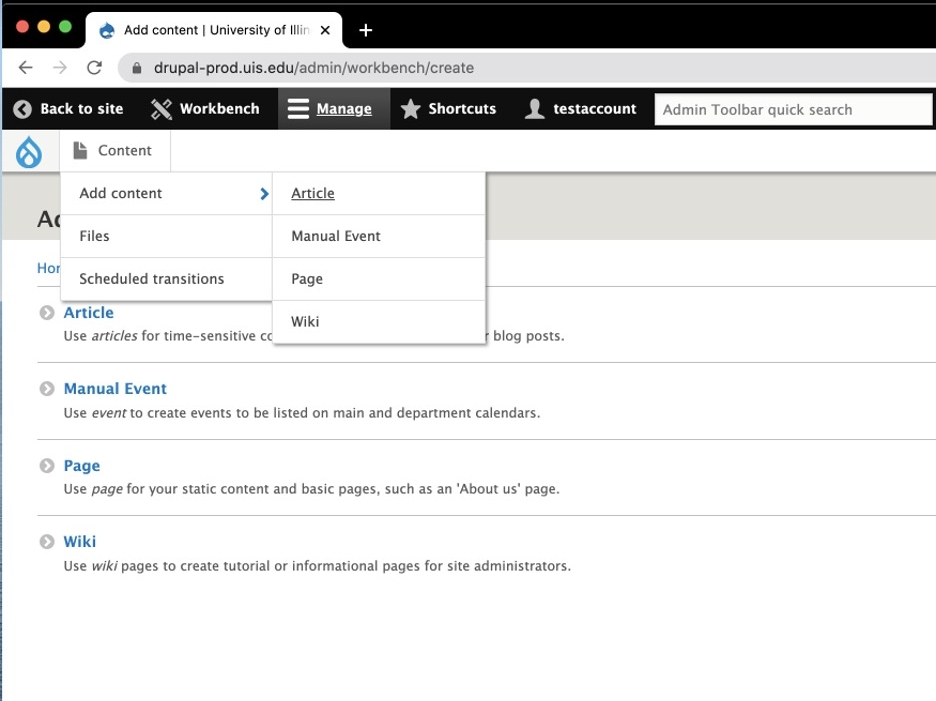
To create a news article or featured profile hover over Manage > Content > Add Content > and click on Article.
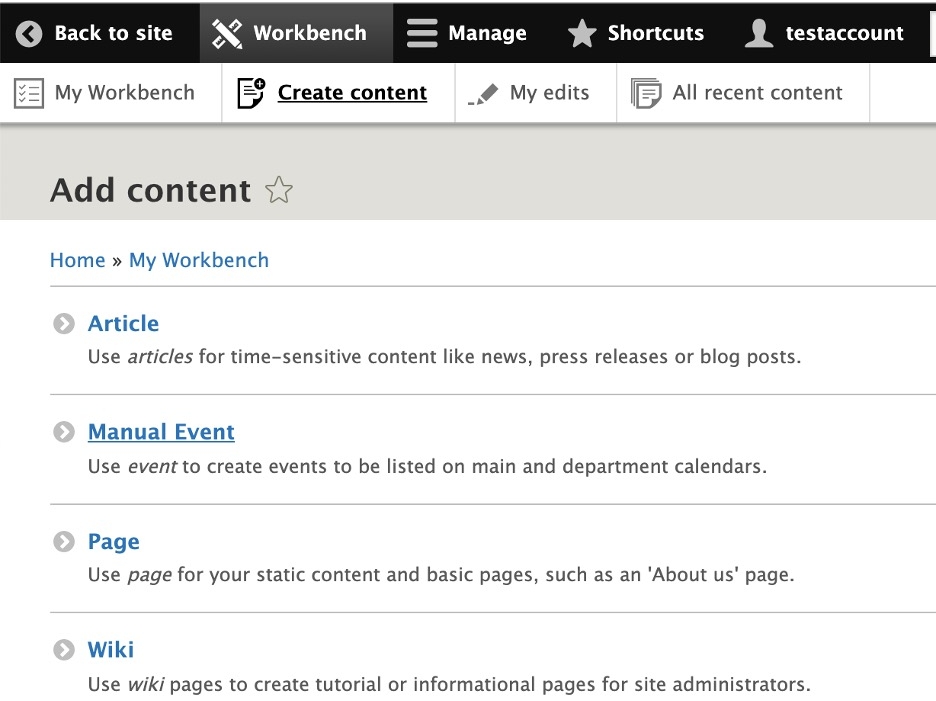
You can also add content by selecting Workbench > Create Content and you will see the different types of content that you can create.
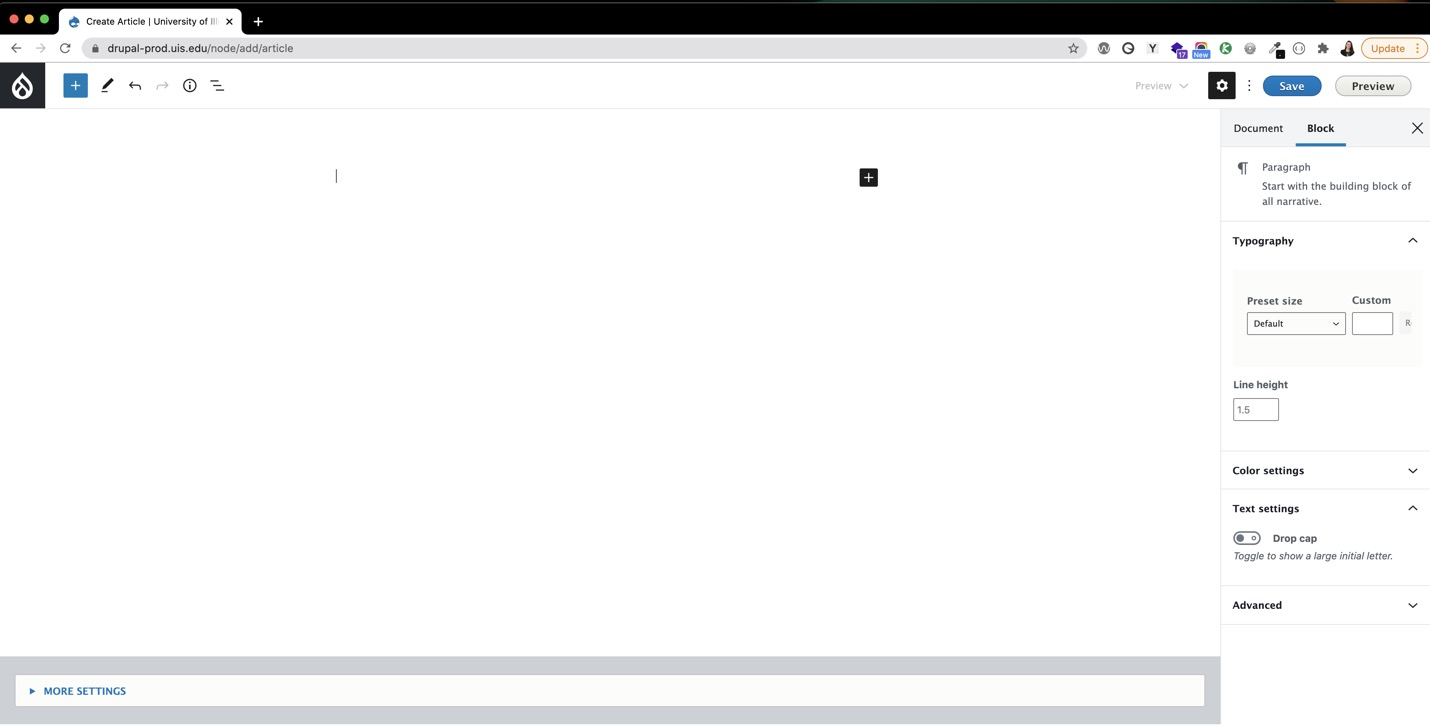
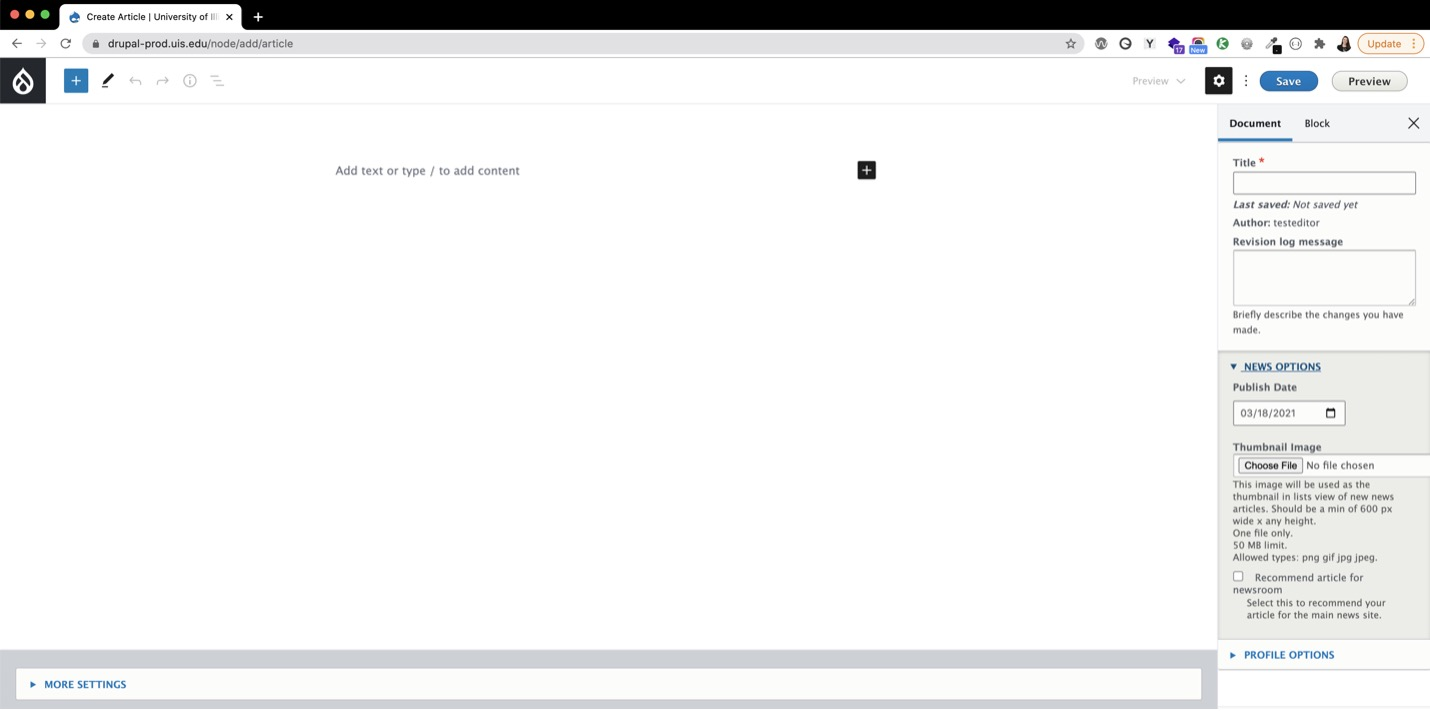
In the right sidebar you will see multiple options. Select document tab (if not already selected) and enter the page title.

Add the text and/or other media in the editor. Utilize the various blocks for quotes, images, and video embeds to easily add other types of content to the page. When selecting a block you will the right sidebar options change, allowing you to change different options, depending upon the block. Review the Gutenberg Block Examples page to see some of the available block options.
More Settings
Once you are finished adding content to the editor, scroll to the bottom of the window and click the ‘More Settings’ dropdown.
- Title Caption – add a caption to be displayed in the banner under the article title. This is helpful to break up long titles
- Author – add the author information
- News Categories – a list of keywords used to tag articles for like content. This is useful for grouping content and helping the site to recognize related content. If the term does not already exist in the list it will be created. Use all lowercase to add terms and search for the term and select if available before adding a new term. DO NOT add department names as a category.
- Header Media – add up to 3 images that will rotate on page refresh. Sizes for homepages are 1920 x 1080px at 72 dpi and the subpage header images are 1920 x 700px at 72 dpi.
- Department – add the department names which the content is related to. This will automatically add the article to that department’s news site or featured profile pages, if applicable. More than one department can be added, for ex Alumni and Biology can be added and the articles will be pushed to both departments news pages.
- Save as:
- Draft – to preview your content and changes select this option
- Needs Review – select this option when you are ready to publish. Editors are required to submit content for review. Publishers can also submit content for review to OWS if having issues that you need assistance with. Under the page title field there is a place to enter a revision log message to provide information on anything you might need additional assistance with.
- Scheduled (publishers roles and higher) – use this state to schedule an article to be published at a future date
- Published (publishers roles and higher) – select this state to publish the article
News & Profile Options
In the right sidebar you will also see options that need to populated for your news article to display in the correct location.
News Options
In News options there are the following options:
- Publish date – defaults to current day
- Thumbnail Image – upload an image (at 450px x 570px at 72dpi) to be used for thumbnail in featured sections of the site, including homepage and newsroom. Add alt text to describe what is happening in the photo for visually impaired users.
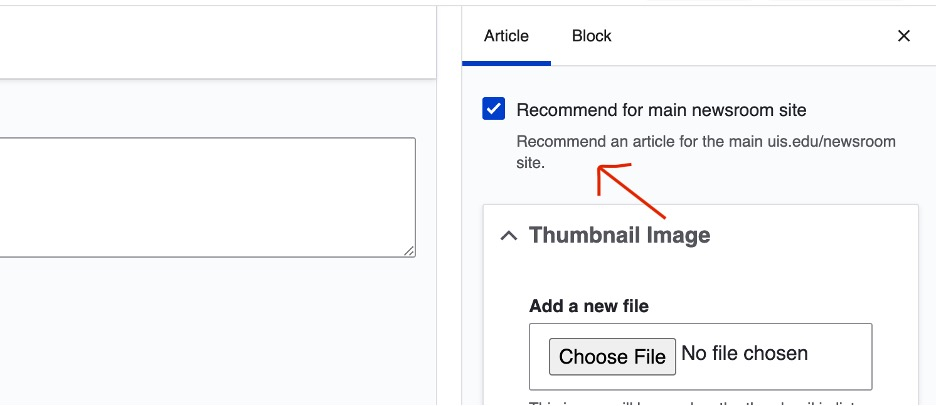
- Recommend article for newsroom - Select this to recommend your article for the main newsroom site.
- Orbit Article – select an option in the dropdown to feature your article on the Orbit site.
Orbit Article Options
All articles submitted will be reviewed by Marketing prior to publication to the site.
First, after you’ve entered your article text and media in the editor, save your article as a “Draft” before picking any news categories. This allows the URL for your article to be generated. Second, go back into your article’s editor and select on of the three sub-categories under “orbit” (there are Breaking News, Campus Announcement, and EOM). Next, once your article is ready to be published, select “Needs Review” under the moderation state selector and click Save.
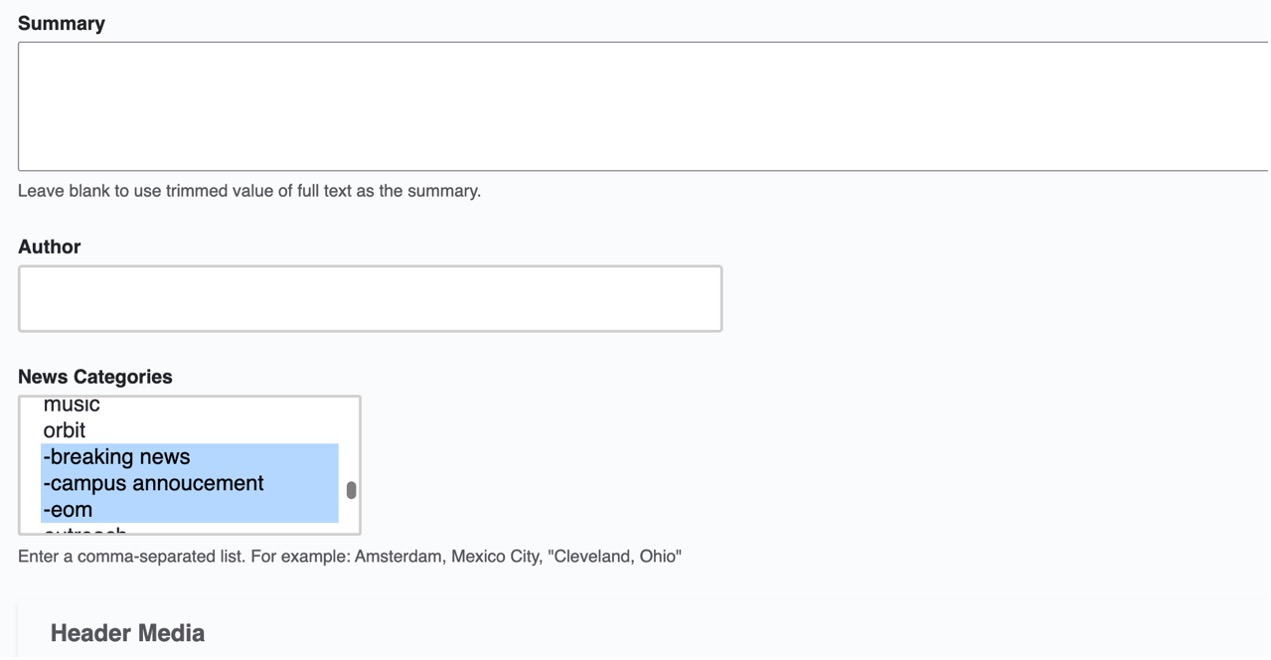
Newsroom Article Options
All articles submitted for the main newsroom will be reviewed by Marketing prior to publication to the site.
First, save your article as a draft so that it generates the URL. Then, go back into the editor and go to the News Options section on the right hand side of the editor. Within this section, you will find a checkmark box with “Recommend for main newsroom site.” Check this option, then when your article is ready for review, change the moderation state to Needs Review.
Profile Options
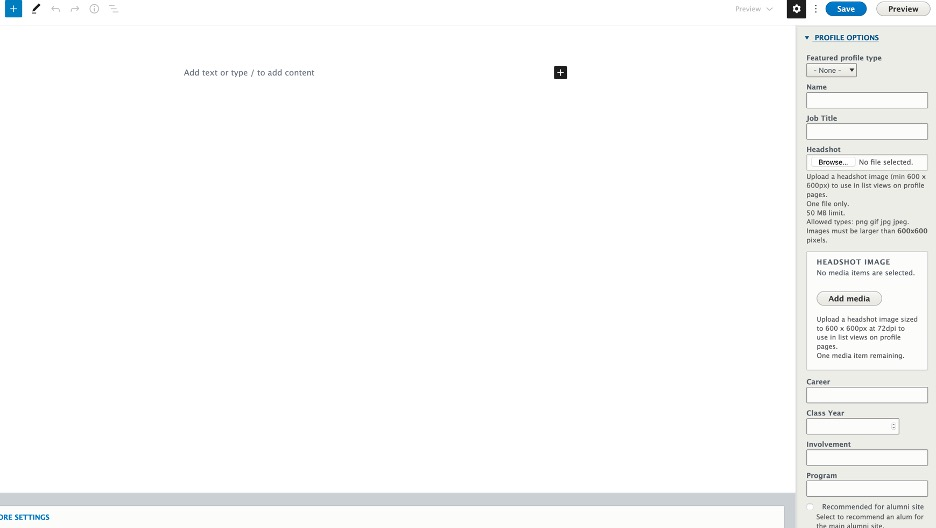
Profile options allows for the capability to create featured profile pages. Profile pages can still be utilized to feature these profiles as news articles but allows us to curate lists of content based on the type to better showcase UIS at large.
Add the content for the profile to the main editor section.
- Featured profile type* - Ex., select the alumni option to add content to featured alumni sections of the site.
- Student
- Faculty
- Staff
- Alumni
- Donor
- Name
- Job Title *
- Headshot – headshot image used to feature the profile (600px x 600px)
- Career *
- Class year *
- Involvement *
- Program*
* if applicable
Once you are finished creating your page, select the Save button at the top right side of the screen.
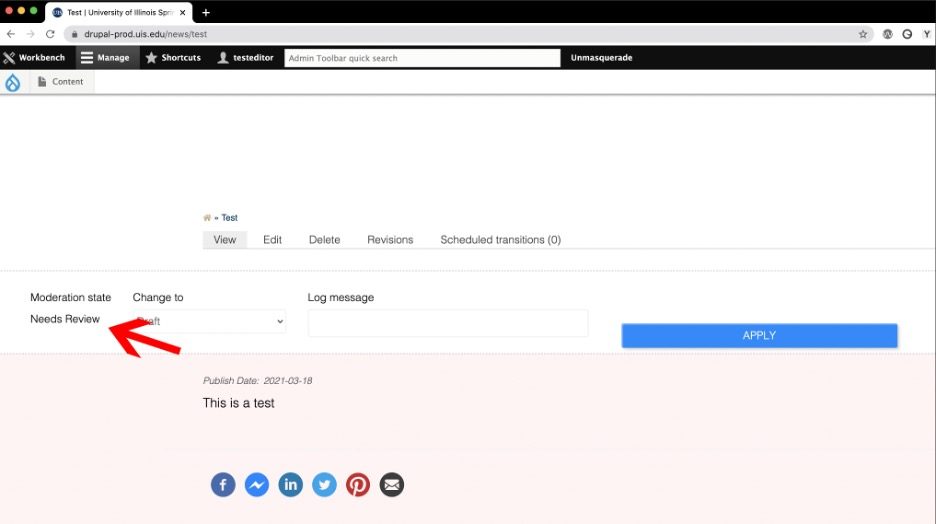
You will be redirected to a page that shows a pink background indicating it is a draft version of the page. You will see the option to submit the page to the Needs Review queue, where a log message can also be entered to tell the web liaison or Web & Digital Strategy what you may need assistance with. For ex: "Need help with extra spacing". Click the APPLY button to submit your page for review.
NOTE: This preview does not show the header content or the intro text to add sidebar menu if added.
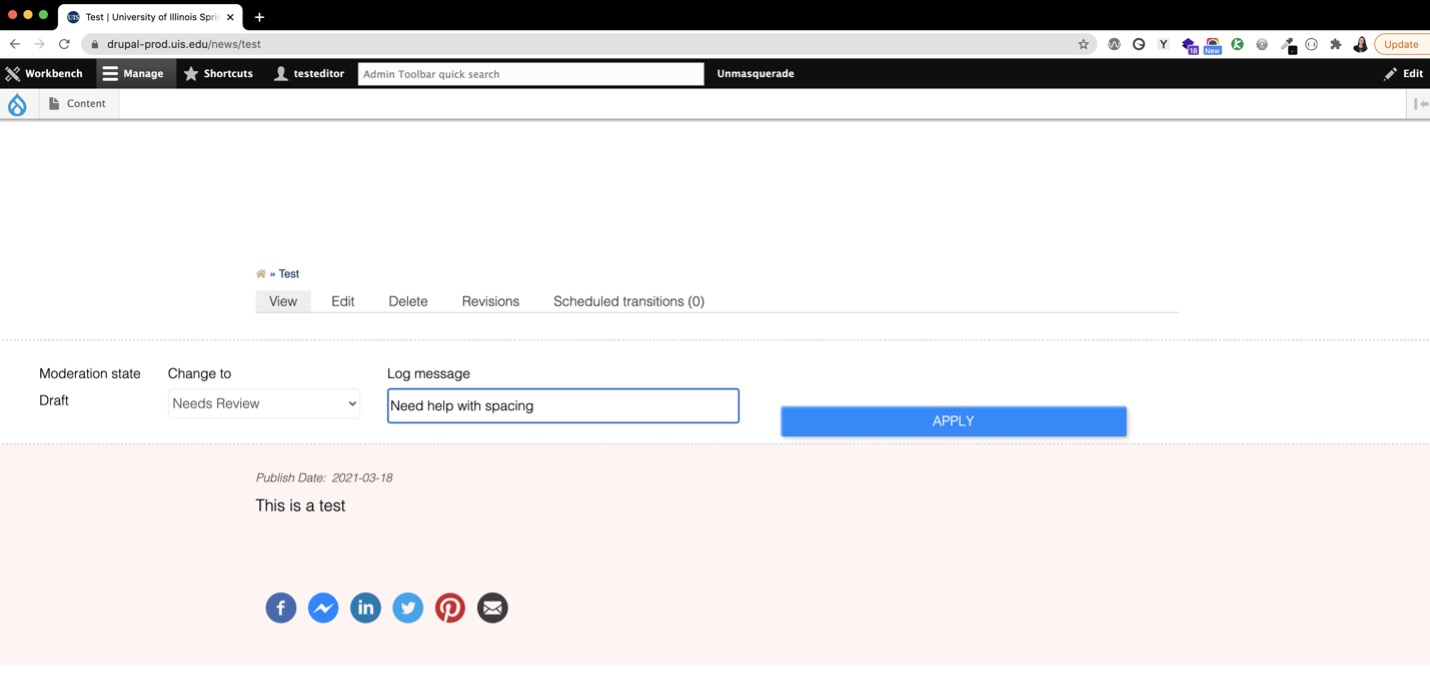
The page will then go to the Needs Review queue for a Publisher in your unit and/or WDS to review and publish to your changes to the site, typically within 48 hours (business days). Once you hit apply, the page will save and you can confirm the page status under Moderation state.
