Kaltura Media is the video management solution at UIS. Kaltura is accessed through the My Media link in Canvas courses. Faculty and students may upload videos created on devices (camcorders, phones, etc.) or record webcam or screen capture videos through Kaltura. One excellent instructional feature of Kaltura is the student viewing statistics. When videos are embedded using the steps below, Kaltura will collect the percentage of videos that students watch, the number of times the video was accessed, and the average viewing time.
Machine-created captions are automatically created and visible after you publish videos (October 2023 and later). Video creators must correct captions to 99% accuracy, as is required by law. Learn how to caption your videos in Kaltura Media. You may also request captioning assistance from DART.
Learn to use Kaltura
- Learn to record and edit videos with tutorials from ITS Kaltura tutorials and the Kaltura in Canvas video repository
- Share your Kaltura video with another instructor
- Best practices for instructional videos

Get help with videos for your classes, including editing, lightboard lectures, green screen, on-location shoots, and more! Contact Scott, our multimedia specialist, for a project consultation.
Embed Kaltura Videos
You and your students can embed a Kaltura video in any rich textbox editor in Canvas -- pages, discussion posts, quizzes, assignments, announcements, and more.
Kaltura Media is a media managment tool built into Canvas. Recordings made with KalturaCapture are automatically published to Kaltura, but you can also upload videos you've created with other tools. Visit the Kaltura informational page created by ITS to learn more.
A fantastic feature of Kaltura is the statistics for video use. It will tell you the percentage of your video that each student watched, how many times it was accessed, and the average view time. Across UIS, the average view time for a video is 7 minutes and 35 seconds, which is on the longer side of the recommended 5-7 minute length for video lectures.
Accurate captions (99% accurate) for all videos are required by law. ITS has instructions for how to caption videos yourself; if you require assistance with the captioning process, the Digital Accessibility Remediation Team (DART) can help!
Embed Kaltura Media into Canvas
In order to add your videos from Kaltura into your assignments, pages, quizzes, and/or discussions, you will need to do the following:
- Go to your Canvas course.
- Create or Edit any page, quiz, discussion topic, or assignment — any area in which there is access to the Rich Content Editor.
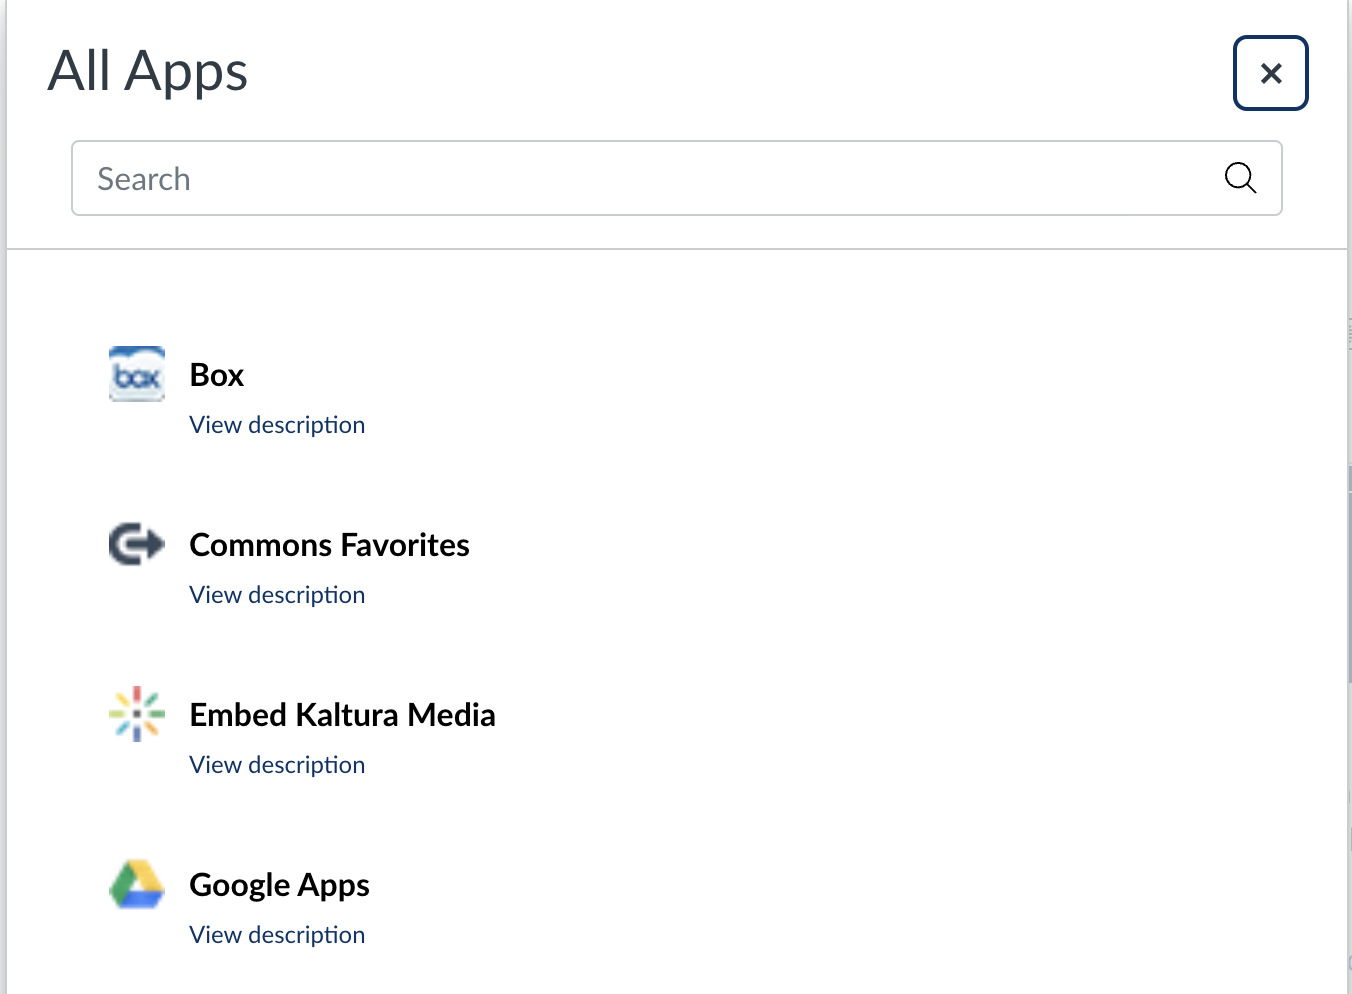
- Click on Tools > Apps > View All
- On the Select App screen, choose Embed Kaltura Media
- Click on Add New to upload or create a video, or click Select next to the video you want to add.
- The video will be embedded in the content editor.
- Click Save or Save and Publish when you are done editing your content.

Student-Created Video Presentations
Assignments that ask students to create video presentations can be excellent methods to assess synthesis of course materials or to present original research. Below you will find best practices for setting up student video presentation assignments in Canvas, including some instructions that you can copy and paste to include in your assignment instructions.
But, first, a word about what NOT to do.

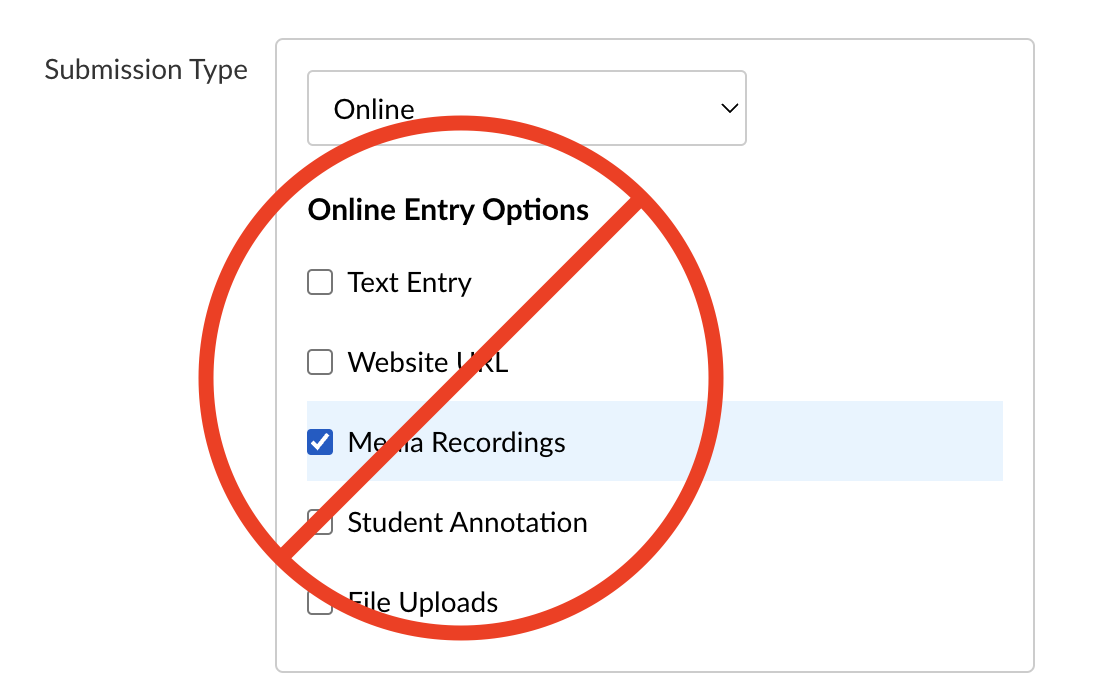
Please do not create a Canvas assignment with a submission type of “online” and “Media Recordings” upload. This type of assignment will have the students upload video files directly to Canvas, which will quickly cause your course size to reach its storage limit. After your course meets its storage limit, you will not be able to upload any additional files to your course.
Instead, use Kaltura (My Media) through Canvas and have students embed or link to their presentations.
Instructions to copy/paste for students
If you are developing Canvas assignments that require your students to create and post videos, the following copy and paste resources may be helpful.
Before copying and pasting these resources, first ensure that you have My Media enabled in your course menu (under Settings > Navigation) so that students can record and/or upload their videos. Then, decide how you'd like students to submit their video and expand the corresponding accordion panel to copy and paste instructions into Canvas.